Thursday, January 11, 2007

Scarf Tales — Editor's Cut


I started scarf #3 the very next day after I finished scarf #2, and finally got the scarf that I remembered. This scarf looks more crocheted than knit, and has the looseness I envisioned. It flows, it drapes, it sparkles, and it has already been stolen by Eldest Daughter (it was loomed with LB Inc in "Blue Shades," a favorite of hers).


Like scarves #1 (LB Inc "Copper Penny") and #2 (LB Inc "Autumn Leaves"), this one took only an evening to make (I'm not including frogging and experimenting time here!). It ended up like the others at somewhere between four- and five-feet long, and has a six-inch fringe on each end. Each scarf took less than one ball of yarn (they run a little over 100 yards).

Scarf #3 uses a "triple-wide" stitch, which is the exact same stitch as I described for scarf #2 (the "double-wide"), but which is wrapped around three pegs instead of two. So the pattern is exactly the same, repeated until you reach your scarf's desired length:

— Row 1 e-wrap and knit off (knit stitch)

— Row 2 purl stitch back

— Row 3 e-wrap 3 pegs for each stitch, knit off the first peg, then anchor that stitch and lift the loose loop off the tops of the second and third pegs. Move across the loom wrapping three pegs for each stitch.

Repeat.

The fringes were simply 12" lengths of the same ribbon yarn tied on using a lark's head knot. [sigh] Youngest Daughter has already chosen LB Inc "Carnival" for her scarf.

Scarf Tales (Take 3)

Part of the reason that I frogged this project so many times was that I was hung up on my "vision" for this scarf. I had gone to a pediatric oncology seminar last spring, and fell in love with the long, skinny scarf that the woman presenter was wearing. During breaks, my mind kept wandering to thoughts of what it would take to loom that scarf. It looked like it was made from a bright metallic ribbon yarn, it had a pretty fringe on each end, and it moved softly as she moved.

LB Incredible looked like the right yarn, but I never got around to buying it because $6 a ball was a little much to just "play around with." I finally got my chance last week when Michael's put it on sale for $2, and I snatched up several balls (note: never yarn shop with kids who loom — they are yarn magnets and you will walk out of the store with waaay more yarn than you intended to buy).

I loomed and frogged my first scarf nearly a dozen times, yet I still wasn't satisfied. Oh, it is pretty and I'll wear it, but it wasn't the scarf I remembered. So back to the looms for more experimenting. Another half-dozen frogs later, I finally hit on it — a combination of stitches that was working for me, and I was starting to create the scarf I envisioned.


This scarf was loomed as a three-row pattern, with the same three rows repeated for the entire length. I was still using an ITA loom as a rake, but I switched to a smaller one that would be easier to handle in my lap. Row one was cast on as an e-wrap around eight pegs. Then I e-wrapped again and knit off that row. The second row was done as a purl stitch. These two rows became my "anchor" stitches for the pattern, and by repeating them throughout I ended up with a nice flat scarf.
Okay, row number three. I really do wish I had a video camera to take pictures of how I'm doing this, because explaining it in words makes it much more complicated than it really is. Bear with me —

You are working an eight-peg panel. For row three, you are doing a variation of a simple e-wrap.

— Take your working yarn (it's on the inside of your loom) and wrap it from behind peg 1 around peg 2 (inside to outside), then bring it back around peg 1.

— Knit off peg 1, then put your finger on the working yarn still looped on peg 1 to ANCHOR it.

— GENTLY lift the loose upper loop off peg 2. (You now have a big loop of yarn on the inside of the loom that extends behind peg 1.)

— CONTINUE TO ANCHOR that loop on peg 1, and make your next wrap from behind peg 2 around peg 3 (again, inside to outside).

— Knit off PEG 2, then move your anchoring finger to PEG 2.

— GENTLY lift the loose upper loop off peg 3. (Your second big loop of yarn now extends behind peg 2.)

— Wrap around pegs 3 and 4. Knit off peg 3, anchor peg 3's loop, and lift the loose loop off peg 4.

— Continue to wrap your pegs this way (double-wide) until you are past peg 8. At peg 8 you will be wrapping 8 and 9, but will be removing the loop from peg 9.

— To begin the next row, e-wrap all of the pegs back from 8 to 1. When I do this, I wrap the first two pegs and knit them off as I wrap them, which helps anchor those very loose stitches. When all of your pegs are e-wrapped, knit them off. THIS IS THE FIRST ROW OF YOUR SECOND SET. Now do a row of purl stitches back to the other end.

— Continue with your double-wide wrap back, and repeat these three rows until you have the length you want.

If you can follow these directions for a double-wide stitch, then you'll find variation #3 a piece of cake.

Scarf Tales (Take 2)

Three scarves loomed this week from Lion Brand Incredible yarn, three completely different results.

This flat nylon yarn has a lot of body to it, giving it a real springiness that makes it a challenge to work with. But it also has some gorgeous, super-saturated colors and a metallic glint that I knew would make it perfect for a skinny fashion scarf, and I was determined to figure out how to loom with it.

For my first attempt at a scarf, I chose Lion Brand Incredible in "Copper Penny" (and boy, is that metallic ribbon hard to photograph!), and an In The Attic large gauge round loom.

I loomed this scarf on an ITA adult-size large-gauge round loom as a flat panel, and simply alternated rows of knits and purls (to keep it flat). But I added a little twist — to lighten it up, I "super-sized" my stitches. I wanted the stitches loose so that you could see it was made from a ribbon yarn. As I wrapped the ribbon, I went around two pegs for each wrap, and then skipped a peg in between. As a result, for this eight-peg-wide scarf, I used about 24 pegs. This prevented the stitches from tightening up and flattening out the yarn, and really allowed you to see the colors.

I liked the way this scarf ended up, but it wasn't the scarf I planned. Scarf #1 came out a little boxier and denser than I wanted, but after hanging in my closet for a week it has loosened up a bit, and has a nice flow to it. Not quite the drape I wanted, but I got closer with scarf #2.

Monday, January 01, 2007

Scarf Tales (Take 1)


Have you ever bought a yarn because you fell in love with it, had a plan for it, and then not been able to get from point A to point B?

Oh I am having a devilish time with this Lion Brand Incredible yarn I just bought. It is an absolutely gorgeous metallic ribbon yarn, dyed in rich, eye-popping variegated colors. I've been lusting after it for months, but at $5.99 a ball it was just too pricey for an experiment. Then Michael’s put it on sale for $2 a ball this week, so I bought it – in fact I bought three skeins of it.

My plan was to loom myself a long, slinky fashion scarf from it, something I could drape over business-casual to dress it up a little. I've made tons of skinny scarves for The Girls and my friends, but this was going to be for me. I've made scarves out of fun furs, and fancy furs, and bling bling and nubblies. I've used cottons, and wools, and silks, and even banana silks. I love scarves, but nearly every one I've loomed has been gifted away. Well, when this yarn came on sale, I knew it was my turn.

I have now frogged the silly thing nine times. The Lion Brand catalog claims that Incredible “drapes like silk.” Nuh unh! This stupid ribbon yarn has more body than Oprah's, uhm, hair. It has a life of its own, and is so wild and springy that my vision of a silky accent is turning into something that looks like it should be tamed with a whip and a chair. I have tried everything, and this yarn (and we have really stretched the definition of “yarn,” now haven't we?) just won't lie flat. I even tried pressing a section of it overnight between heavy books. Did it make any difference? I lifted off the books this morning, and it just stuck its tongue out at me and sneered.

Well, at the very least I am inventing combinations of loom stitches that haven’t been tried before, and I am nearing the end of scarf number one. It's not what I envisioned, but it is wearable, and one-of-a-kind. But I'm not done; the yarn war is not over. This one comes off the loom tonight, and I already have a plan for skein number two.

Take that, Incredible!

Saturday, September 23, 2006

Simply Pretty Soft Ponchos


What happened to summer? There we were, working in the garden, picking tomatoes for gazpacho, hot peppers to can for salsa, and pickles for, well, pickling. It was 80° and sunny. Two weeks later, and we've got cold rainy days where the highs never get out of the 50's, and we have already had our first frost advisory. Wow, you'd think we lived in Wisconsin, or some place like that!

So what to throw on for warmth in this brisk fall weather? How about a poncho! Ponchos are a fun, fast, and very easy project for the loom knitter. Your basic poncho can be made quite simply by knitting two rectangles that are joined short side to long side. In fact, it took less than a weekend each to make the two ponchos shown here. Both ponchos use the same basic pattern.

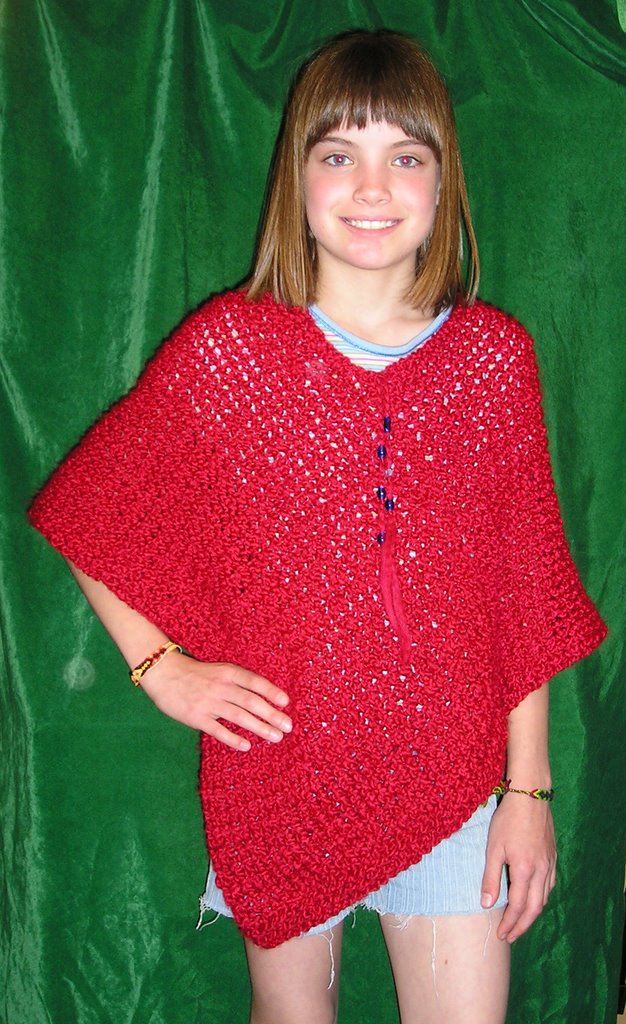
For Eldest Daughter's poncho (she's my tall ten-year-old), I loom knit two flat panels using 35 pegs (all but one) on the Knifty Knitter round green loom. The only reason I made these panels 35-pegs wide was because this gave me a 17" to 18" wide rectangle.

For the red poncho, I started both rectangles by wrapping the pegs, then purling one row, knitting the next back, purling the third row, knitting the fourth, then purling the fifth (5 rows total). This is not required, it just makes the short ends lay flatter and makes them a little easier to join. Then I e-wrapped and knit 70 more rows, then ended with five final rows of purl, knit, purl, knit, purl, for 80 total rows. My rectangle was approximately 27" to 28" long — 10" longer than it was wide. For my slightly smaller Youngest Daughter's poncho (she's my six-year-old), I loom knit the same number of pegs in width, but knit it to only 26" to 27" long — 9" longer than it was wide.

Okay, the magic number here is the difference between the short and long measurements. For a small child, I make the difference about 9". For an older child or small adult, I make the difference about 10". For a large adult, I knit a panel that is closer to 20" wide and make the difference about 11". When it comes time to join your rectangles, make sure that when you lay the pieces together, there is the correct 9", 10" or 11" left between the piece you joined and the edge of the long side. What this means is that your 17"-wide edge takes up 17" of the long side (either 26" or 27" for these two ponchos).


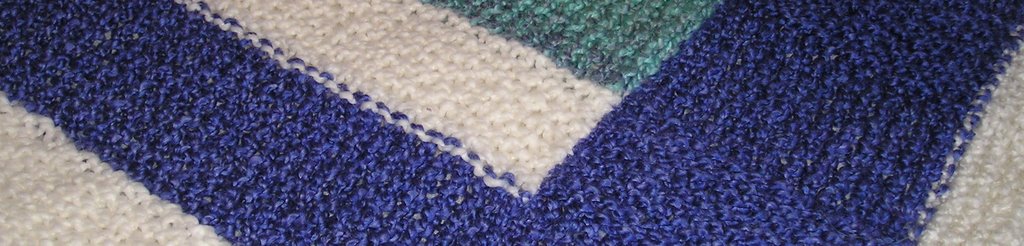
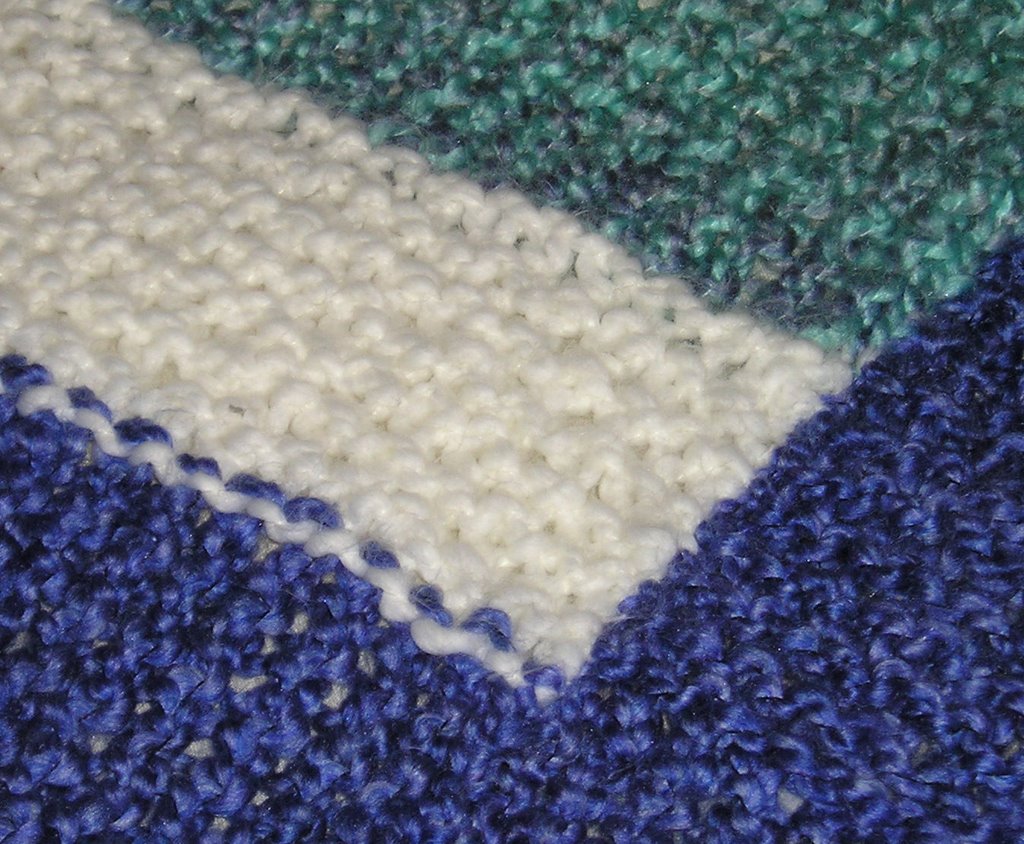
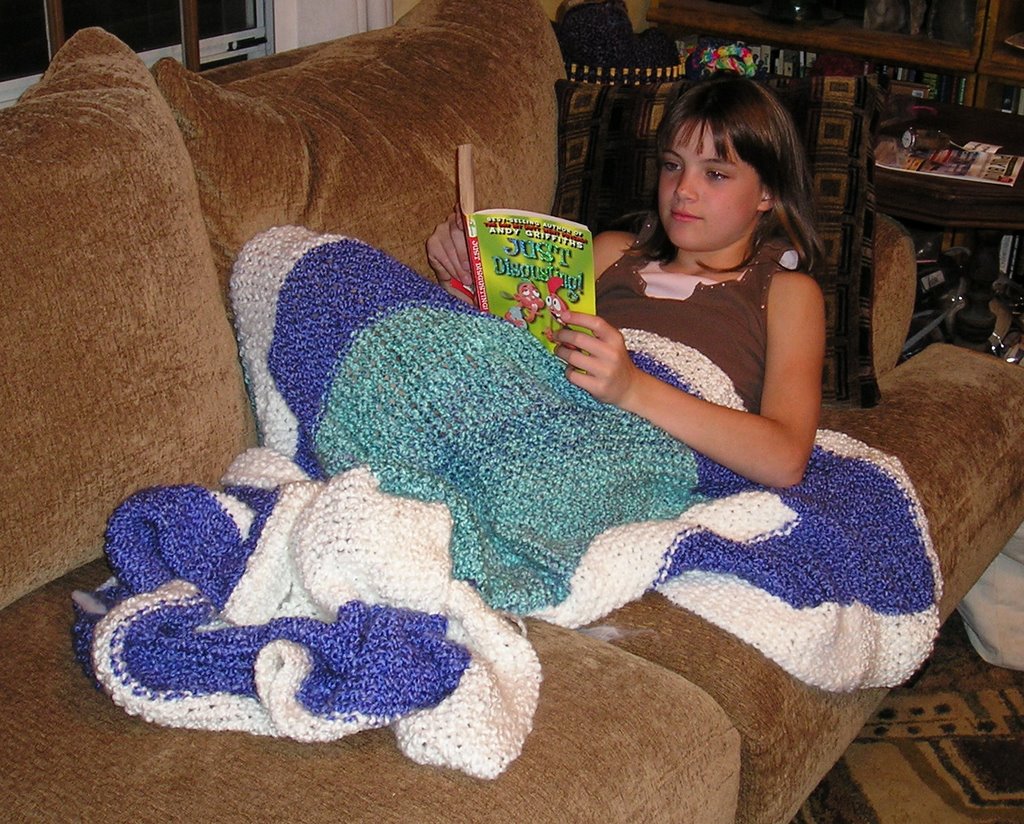
For the cream, blue and pink poncho, I used the mock crochet stitch for all rows. Because the mock crochet stitch lies flat, I did not need to create a flat edge by alternating rows of knits and purls.

Once you have two rectangles of approximately 17" by 27", it is time to join them. The best way to visualize what you are about to do is to cut yourself two 2" by 4" rectangles out of paper. Tape one short end of rectangle one down to the bottom edge of the long side of rectangle two — you'll have an "L" shape when the two pieces are attached together. Now take the short side of rectangle two, and curl it around until you can tape it to the long side of rectangle one. It's really not as complicated as it sounds once you work it out with your two pieces of paper. To make the joining easier, mark that 9" or 10" point on the long side of both rectangles (the amount that will be left over and form the neck opening in the poncho) with a piece of contrasting yarn. It will be much easier to stitch the second edge together if you already know where the ends should fall.

Stitch together one edge (whipstitch, mattress stitch, whatever works for you), then stitch the other edge, and you're done. I wove in all the tails except for two long ones at the front neckline, where I added some blue beads for accent on the red poncho. For the detail on the cream, blue and pink poncho, I used pretty veined marble beads from an old necklace to trim and finish it.

[Loom: Knifty Knitter round green loom, 5/8" gauge. Yarn: Lion Brand Homespun, Candy Apple and Quartz.]

Monday, September 11, 2006

The Greatest Loom Knitting Movies of All Time


Despite the popularity of its "100 Greatest ..." lists (such as "100 Greatest Movies" and "100 Greatest Comedies"), the American Film Institute has been pretty much ignoring that popular movie subgenre devoted to looms and loom knitting (and we're not even going to mention the Academy's snubbing of yarn folk). But recently the AFI decided that with the booming looming population, it might be time to rectify that ommission. In fact, just this afternoon AFI finally announced the ...


Top 14 Loom Knitting Movies of All Time


#14 — Indiana Jones and the Too Many Looms

#13 — Armageddon (More Yarn and You Can't Stop Me!)

#12 — Knitting Hill

#11 — Purl Harder

#10 — The Last Yarn Fighter

#9 — Red Heart

#8 — The "Dare Stitch!" Project

#7 — The Longest Board

#6 — True Plies

#5 — Lara Loft: Loom Raider

#4 — Rakes on a Plane

#3 — The Chronicles of Yarnia: The Lion Brand Stash in the Wardrobe

#2 — A Slub's Life


And the Number 1 Loom Knitting Movie of All Time—


#1 — Scarf Ace


[Loom pictured is a Fine Gauge loom from Loon Looms Wood Rose line.]

Sunday, September 03, 2006

A-Quilting We Will Loom


I've always been fascinated with quilts. Everything about their size, artistry, and home-made comfort just appealed to me. I started a quilt many years ago, designing and hand stitching each block, but life got in the way and into a box those blocks went, packed away for "someday." I will finish that quilt, when the Time Gods grant me my wish for a day-stretcher.

But in the meantime, I have discovered loom knitting. And with that discovery I found that I could create afghans that filled that quilt-shaped hole in my soul. I stopped lusting after quilts, and started lusting after yarns and looms. My looms allow me to experiment with size, with color, and with pattern, and slowly but surely I am teaching myself how to recreate the "feel" of the home-made quilts I love.

Yes, even I remember asking on a loom-knitting board, "Can anyone tell me how big to make an afghan?" That was when I thought there were rules to looming, rules that confined you and guided every stitch. But I've learned a lot since then, and learning is good. I've learned that I can make an afghan any size I darn well feel like. I've learned that it's okay to let my kids pick the colors (with just a wee bit of guidance), help with the design, and even knit a couple of rows, and it will still be beautiful. And I've learned that it's the process as much as the project — the journey sometimes is the destination.

The afghan pictured here is one I started on our traditional Mother's Day camping and fishing trip. Eldest Daughter chose the colors, and helped me work out the window pane design. I'm an early riser, and so as not to disturb the rest of the family's sleep, I would gather my yarn, loom and clipboard, and sit on the front porch of our cabin overlooking Blackhawk Lake. With only the birds for company, and even with an occasional stop to watch the mist rise off the lake, I could get at least an hour of quiet looming in before anyone else woke up.

Eldest Daughter loves her afghan. She sleeps with her afghan, reads with her afghan, and would probably adopt it as a "blankie," if she wasn't about to start the sixth grade. Her younger sister also has a loomed afghan, but is already picking the colors for her next one.

My quilt blocks will probably stay in their box for a little longer, I'm afraid. I have more afghans to loom.

[Finished afghan size approx. 54" square. Lion Brand Homespun in Cobalt, Deco and Waterfall. Four panels (two 35-pegs wide, two 20-pegs wide) on a Knifty Knitter round green loom.]

Friday, September 01, 2006

Why Bother?


"But couldn't you just buy a hat or a scarf? I mean, what's the point?"

We've all heard it. Or if we haven't heard it, we've been subjected to the condescending smile or sneer as we admit to someone who asks, that "Yes, I did make it myself." I'll bet that just about every one of us has had to explain why we choose to loom (or knit, or crochet, or bead, or paint) instead of just going out and buying a "similar" item from a store.

But we persist. Despite the occasionally snide negativity, we continue to craft because it means something to us. Every time we create something, it is absolutely unique, the only one of its kind in the world, even if we tried (successfully or not) to follow a pattern. That makes a lot of this worthwhile for those of us who don't like to play follow-the-leader. This craft is our art. Our chosen craft is an outlet for creativity, a way for each of us to express our individuality (and keep our hands occupied while we watch The Unit or CSI). So be proud that you are a loomer, a crafter, a creative, caring person. If necessary, remind yourself that —

• No one else will ever have the beautiful afghan that graces your couch.

• The new mother will certainly not get a duplicate of the wonderful layette you created.

• Your kids won't look like they shop at the same discount store as all the other kids when they wear their home made hats, scarfs and mittens.

• That fun fur pillow on the chair? All yours.

• The gorgeous fashion scarf you get compliments on? Yours and yours alone.

• The chemo hat you made in the spangly pink fun fur for the 12-yo leukemia patient? She wears it with pride because no one else has one, and it makes her feel special.

Now go get creative. You know you have it in you, so flaunt it!

Hey, You Asked!
—What Is the Best Way to Change Yarn?


"What is the best way to join the ends of your yarn if you need or want to start another skein?"

There are lots of creative ways to join ends, but here are a few methods that I like. I can use these methods when I want to start a new skein, whether I am using the same color or changing colors.

New yarn, new color. If you are changing colors, it is best to add a new color at the end of a row. Wrap your yarn to the end of your row (or to your starting peg) then knit that stitch off. Pull your old working yarn to the inside (or back) of your loom and anchor it. Start your new color by anchoring your new yarn, wrap your next peg, then continue wrapping your pegs. Knit off as you have been, and continue to knit with your new yarn.
When you have worked a whole row past where you joined your colors, you can untie both your old and new yarns from their anchors. Tie these two ends in a loose single knot (this helps ensure that there will be no hole in your work), then use a yarn needle or crochet hooks to weave them back into their matching color.

New yarn, same color [method number one, for bulky yarn]. If I'm working on a thick piece, or using bulky yarn, and am just adding a new skein in the same color, then I do a blended weave of the two ends. I knit my first skein until I have about eight or so inches left, then I take that working 8" end, and temporarily let it dangle on the inside of my loom. Next I take about the first few inches of my new skein, and starting right where I left off wrapping and knitting off, I weave that tail in-and-out between my pegs. I'll usually weave that tail in-and-out for six to ten pegs, depending on what I am making. Holding that working yarn in place, I go back to the ending of my first skein, and weave that in-and-out on opposite sides of the same pegs.

I now have two strands wrapped through the same pegs, and on each peg only one appears on the outside. Now just knit off this double strand until you get to the end of your wrapping, then continue to wrap and knit off your new yarn. You may have to tuck in an end when you're done, but it is a virtually invisible join.

New yarn, same color [method number two, for fine yarn]. Wrap and knit off until you are left with about six inches of your old skein. Take the yarn from your new skein, and holding it together with your first yarn, continue to wrap and knit off, treating the two strands as one. Do this for about four to eight pegs, then drop the old strand and continue with the new. When you are done, you can come back and trim off or tuck in the ends, and the join is nearly invisible.

Hey, You Asked!
—What Do They Mean By a Yarn's "Weight"?


"When someone refers to the weight of a yarn, are they actually refering to the weight as in ounces or to the reference of sport, bulky, etc.? Which yarns are the heaviest/lightest?"

Yarn "weight" is all about the yarn's thickness. A lightweight yarn is a fine (thin) yarn; a heavyweight yarn is a thick (bulky) yarn. The tightness of the spin, the density of the strand of yarn, and the fiber from which it was created will all affect the weight of a yarn. Yarn weight is measured in YPP's (yards-per-pound), sometimes YPO's (yards-per-ounce), and in WPI's (wraps-per-inch). A yarn with a low YPP or WPI number (such as 250 YPP or 6 WPI) is considered a bulky, or heavyweight yarn. A yarn with a high YPP or WPI number (such as 1200 YPP or 18 WPI) is considered a fine, or lightweight yarn.

If a yarn is loosely spun with manmade fibers, and spun so that it has lots of "loft," and airspace between the fibers or strands, then that yarn will be considered a heavyweight, or bulky yarn, even if it doesn't weigh much (think Lion Brand Homespun). But take another fiber (such as New Zealand wool), and spin its fibers together tightly, maybe even plying it (twisting more than one strand together), without leaving much loft or airspace, and you have a dense, heavy yarn that may still be considered "lightweight."

"Worsted weight" is usually considered your average, middle-of-the-road yarn weight. Terms such as "sport weight," "fingering," "DK," and "light worsted" are all terms used for fine, lightweight yarns. "Heavy worsted," "bulky," "super bulky," and "rug" are terms used for thick, heavyweight yarns.

For more information (and a chart comparing yarn weights), click the link under Dux FAQs to read, Yarn Basics—YPOs, YPPs, WPIs.